Identifying and Correcting Incorrect Stitch Length
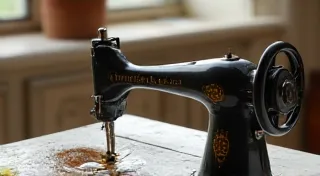
One of the most common issues encountered when using vintage sewing machines is incorrect stitch length. A stitch that's too short can pucker fabric, while a stitch that's too long can be weak and unravel easily. This article will guide you through understanding stitch length adjustments on various vintage models and how to diagnose and correct the problem. We're focusing on common issues; specific models can have unique quirks, so always refer to your machine's manual if available.
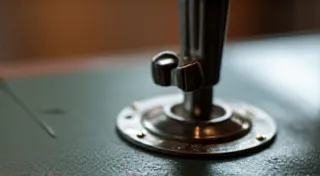
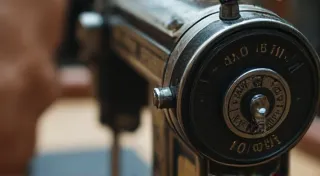
Understanding Stitch Length Adjustment
Most vintage sewing machines use a numbered dial or lever to control stitch length. These numbers often correspond to a range of stitch lengths, not a precise measurement. The scale isn's always consistent between different manufacturers. A "3" on a Singer might produce a different length than a "3" on a Pfaff or a Jones. The intricacies of these older machines are fascinating – some collectors dedicate considerable time learning the history and nuances of machines like the Singer Featherweight, and its evolution. The complexities often extend beyond just stitch length, impacting the overall sewing experience and requiring a nuanced understanding of the machine’s mechanics and its intended use.
Before adjusting anything, familiarize yourself with your machine's manual. It may contain specific diagrams and explanations related to stitch length control. If you don't have a manual, online resources and forums dedicated to vintage sewing machines can be a valuable source of information. Often, understanding the underlying principles of how a machine's stitch is formed, from needle movement to hook engagement, is key to troubleshooting issues. This knowledge can prove invaluable when dealing with more advanced problems that might seem initially related to stitch length but stem from other mechanical aspects.
Common Causes of Incorrect Stitch Length
- Misunderstanding the Scale: As mentioned above, the numbers aren't standardized. Experiment to understand how your machine interprets the numbers.
- Mechanical Issues: Over time, the stitch length mechanism can become stiff, gummed up with old grease, or slightly damaged. This can prevent the mechanism from moving freely, resulting in a consistent incorrect stitch length regardless of the setting.
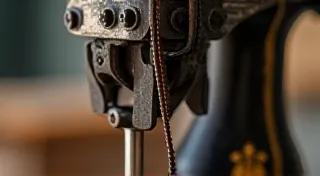
- Timing Issues: While not directly related to the stitch length dial, timing problems can appear like a stitch length issue. If the hook isn't engaging at the right moment, the thread may not be properly interlocked, resulting in a puckered or loose stitch that looks like a stitch length problem.
- Incorrect Thread and Needle Combination: Using thread too thick for the needle size can sometimes mimic a stitch length problem. The thicker thread may not be able to properly loop and interlock, leading to a visibly incorrect stitch.
- Tension Issues: While this is primarily related to tension, incorrect tension can impact the appearance of the stitch length. Uneven tension can cause puckering or looping that may be misinterpreted as a stitch length problem.
Diagnosing the Problem
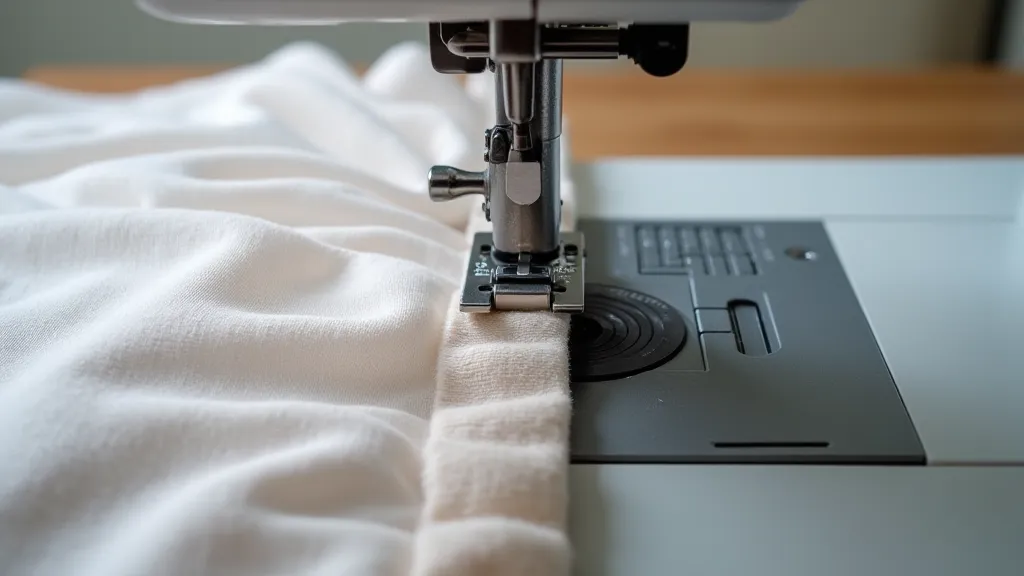
Start with a test fabric (cotton is ideal) and a standard needle size (size 90 is a good starting point). Stitch a straight line using different stitch length settings. Observe the stitches carefully. Are they consistently too short or too long? Does the problem change with different settings? A systematic approach, documenting your observations with each setting, is invaluable in identifying the root cause. Is the issue consistent across different fabric weights? Are certain stitches more affected than others? These details can provide critical clues.
If the stitch is consistently incorrect, it points to a mechanical issue or a problem with the adjustment mechanism itself. If the problem seems to change with different settings, it's more likely an adjustment or tension issue. Many vintage machines, like the Singer 66, require careful attention to detail and a deep understanding of their mechanics to achieve perfect results - you can find a comprehensive guide to its specific stitch functionality. Understanding how the feed dog and presser foot interact with the fabric is essential in pinpointing whether the issue lies in stitch length or feeding problems.
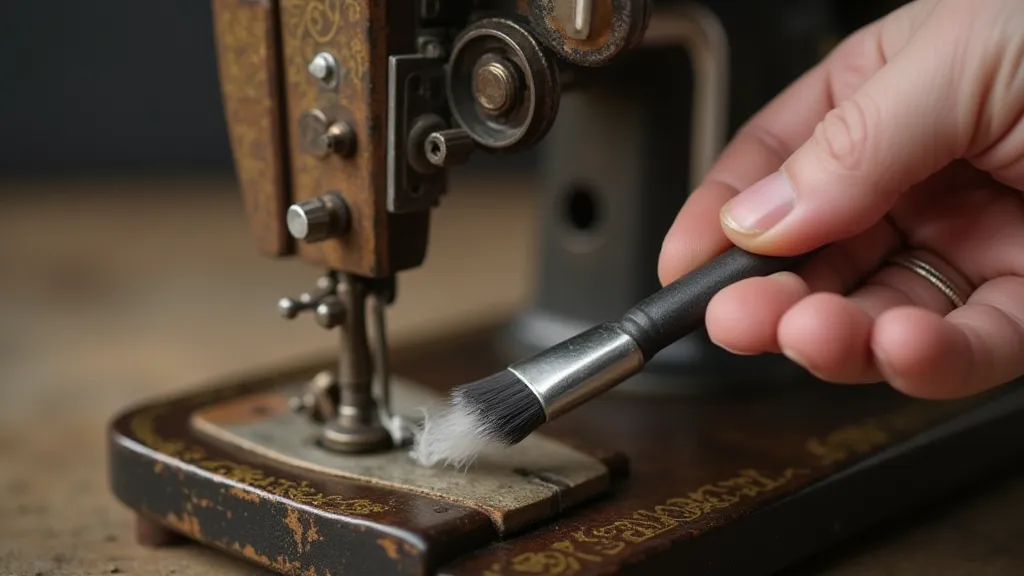
Correcting the Problem – Mechanical Issues
If you suspect a mechanical issue, careful cleaning and lubrication are the first steps. Use a specialized sewing machine oil and a small brush to clean and lubricate the stitch length mechanism. Don't use WD-40, as it can attract dust and gum up the mechanism. If the mechanism is severely stiff, it may require more extensive cleaning and disassembly – this is best left to an experienced repair technician if you’re not comfortable doing it yourself. Restoring a vintage sewing machine often goes beyond just the mechanical aspects; maintaining its original finish is a key part of the process and you can learn about recovering the machine’s original finish. Sometimes, what seems like a stitch length issue is actually a symptom of a larger problem with the machine's internal components, such as worn gears or a misaligned cam.
Correcting the Problem – Adjustment and Tension
Once the mechanism is clean and lubricated, try adjusting the stitch length dial again. If the problem persists, double-check the tension settings. A slightly loose or tight tension can dramatically affect the appearance of the stitch. Experiment with small adjustments to both upper and bobbin tension until you achieve a balanced stitch. Furthermore, if your machine uses brushes for its motor, it's important to check their condition regularly; you can find helpful resources on understanding and replacing common Singer Featherweight motor brushes. Proper tension is paramount; it’s the balance between thread strength and fabric grip that dictates stitch quality and appearance.
Advanced Troubleshooting: Beyond Stitch Length
Sometimes, what appears to be a stitch length problem can be a symptom of a more complex issue. For example, if you are noticing unusual wear or tear on your machine, or if the stitch consistently appears uneven even after adjusting the stitch length and tension, it's essential to look for other potential problems. This could include issues with the hook timing, feed dog engagement, or even the presser foot pressure. The complex interplay between these components often dictates the final stitch quality, and a holistic understanding of their roles is essential for effective troubleshooting.
Regular maintenance is key to preventing these issues from arising. Besides cleaning and lubricating the stitch length mechanism, you should also routinely inspect the feed dogs to ensure they are moving freely and engaging properly. Check the presser foot pressure to ensure it’s appropriate for the fabric you are sewing. And don’t forget to replace worn or damaged parts as needed. A well-maintained vintage sewing machine can provide years of reliable service. The lifespan of a vintage machine is directly tied to the care and attention it receives; consistent maintenance prolongs its functionality and preserves its value.
Seeking Professional Help
Some vintage sewing machine repairs are best left to the professionals. If you're uncomfortable disassembling and cleaning your machine, or if the problem is complex, don’t hesitate to seek help from a qualified vintage sewing machine repair technician. They have the experience and tools to diagnose and repair even the most challenging issues. A skilled technician can often identify underlying issues that are not immediately apparent, ensuring the machine is restored to its optimal performance.
Remember, preserving these iconic machines is a labor of love. With a bit of patience, knowledge, and the right tools, you can keep your vintage sewing machine running smoothly for years to come. Proper care not only extends the machine's functionality but also ensures its longevity as a cherished heirloom.