Repairing a Broken Handwheel: Techniques & Solutions
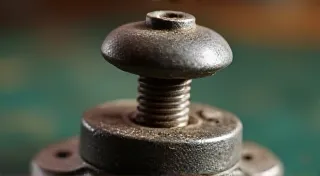
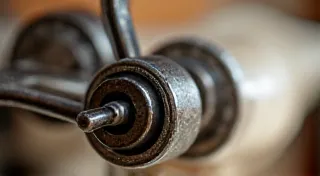
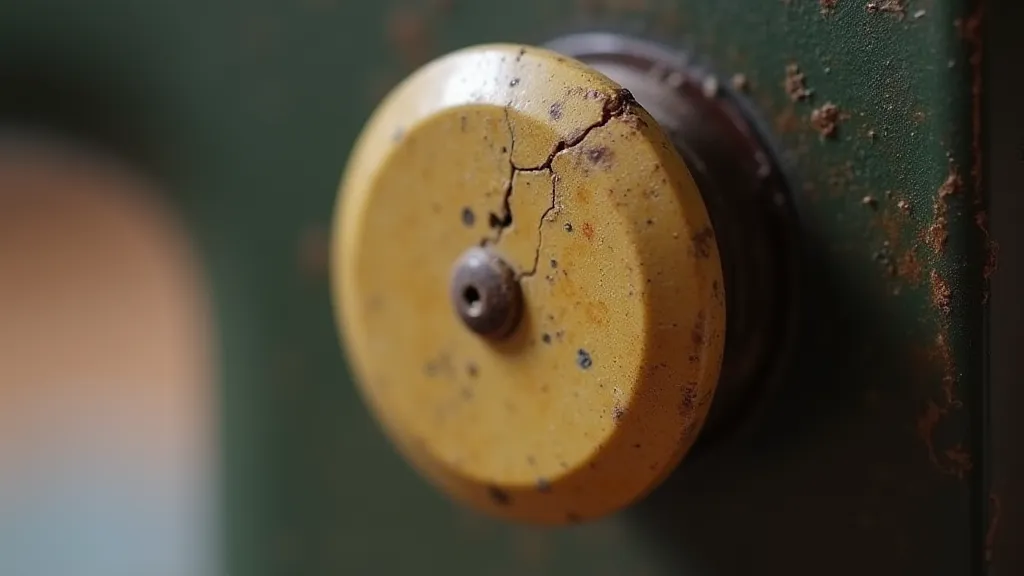
A broken or cracked handwheel is a frustrating problem for vintage sewing machine owners. The handwheel, essential for controlling the sewing machine's stitch length and overall operation, is often made of fragile materials like Bakelite or early plastics, making it susceptible to cracking and breaking over time. This article explores common causes of handwheel damage, repair techniques, replacement options, and preventative measures to keep your vintage machine running smoothly. Addressing issues like these is part of the larger effort to keep vintage machines functioning optimally, a process that sometimes involves more complex repairs like sewing machine motor repair.
Understanding the Problem: Causes of Handwheel Damage
Before diving into repair solutions, it's important to understand why handwheels break. Here are some common culprits:
- Age and Material Degradation: Vintage handwheels, particularly those made of Bakelite, become brittle with age and exposure to sunlight and temperature fluctuations.
- Impact Damage: Accidental knocks and drops are a frequent cause.
- Stress Cracks: Improper tensioning or forcing the handwheel during operation can create stress cracks that eventually lead to breakage.
- Dryness and Deterioration: The plastic materials often dry out and become brittle over time, making them prone to cracking.
Repair Techniques for Broken Handwheels
Depending on the severity of the damage, several repair options exist:
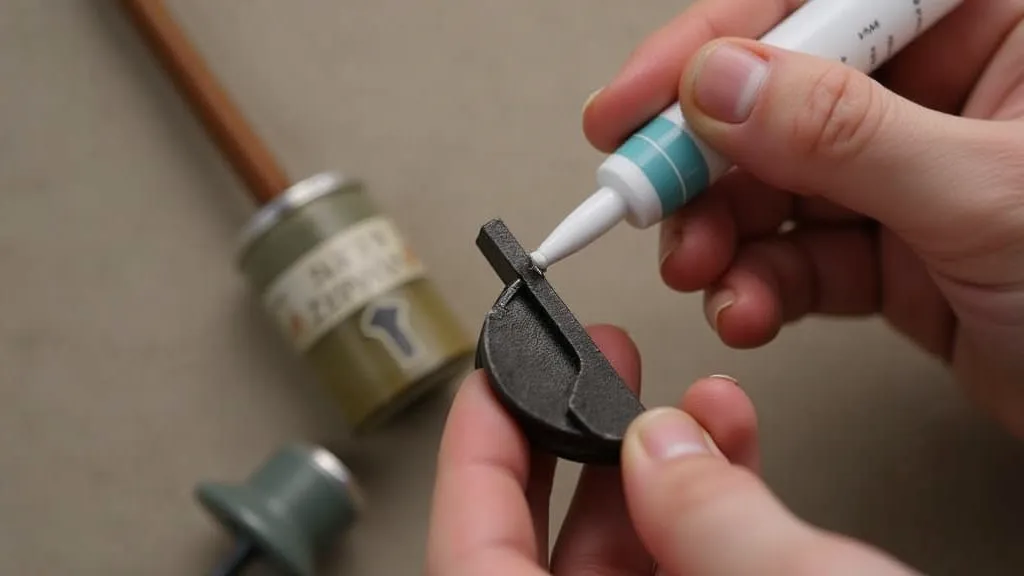
1. Epoxy Repair (for Clean Breaks)
For relatively clean breaks, epoxy can provide a surprisingly strong bond. Here's the process:
- Clean the Broken Edges: Thoroughly clean both broken surfaces with isopropyl alcohol to remove any dirt or grease.
- Apply Epoxy: Using a high-quality two-part epoxy (specifically one designed for plastics), apply a thin, even layer to both broken edges.
- Align and Clamp: Carefully align the broken pieces and clamp them securely. Ensure proper alignment is crucial for a functional handwheel.
- Cure Time: Allow the epoxy to cure completely according to the manufacturer's instructions (usually 24-48 hours).
Important: Epoxy repairs are often visible and may not restore the handwheel to its original appearance. However, they can be a viable solution for restoring functionality. Sometimes, addressing the larger issues with older machines requires a deeper understanding of their mechanics – similar to the troubleshooting needed for understanding why tension isn't right - a common issue; when that occurs, reading “Troubleshooting Tension Issues - A Comprehensive Guide” might be very helpful.
2. Plastic Welding (For more complex cracks)
Plastic welding is a more advanced technique that uses heat and plastic rods to melt and fuse the broken pieces together. This creates a stronger bond than epoxy. This typically requires specific tools and knowledge.
3. Filling Cracks and Chips (for minor damage)
For small cracks or chips, a plastic filler specifically designed for vintage plastics can be used. Apply the filler according to the product instructions, allowing it to dry completely before sanding and finishing.
The process of restoring a vintage handwheel is just one facet of keeping these machines in good working order. Sometimes simple solutions are all that's needed, other times a more complicated repair is needed. For example, if a belt breaks, a quick sewing machine belt replacement can get your machine back up and running.
Replacement Options
If the damage is extensive or the repair seems too daunting, replacement is often the best option. Here are some avenues for sourcing replacement handwheels:
- Online Auction Sites: eBay and similar platforms are excellent resources for finding original replacement handwheels.
- Vintage Sewing Machine Parts Suppliers: Several suppliers specialize in vintage sewing machine parts. Search online for "vintage sewing machine parts" to find reputable sources.
- Sewing Machine Repair Shops: Local sewing machine repair shops may have a stock of replacement parts or be able to source them for you.
- Machine Clubs and Forums: Joining online sewing machine clubs or forums can connect you with knowledgeable individuals who may have leads on replacement handwheels.
- Proper Storage: Store your sewing machine in a cool, dry place away from direct sunlight.
- Regular Cleaning: Clean the handwheel regularly with a soft cloth and mild soap to prevent dirt and grime buildup.
- Gentle Handling: Avoid excessive force when turning the handwheel and handle it with care.
- Lubrication: Periodically lubricate the handwheel spindle with a suitable lubricant (consult your machine's manual for recommendations).
- Conditioning: Some vintage plastic restorers are formulated to condition and protect brittle plastics. Research and use products specifically designed for vintage plastic restoration.
Beyond the practical aspects of repair and maintenance, many vintage sewing machine enthusiasts are fascinated by their history. Learning about the evolution of these machines, especially iconic models like the Singer Featherweight, can deepen your appreciation for their design and craftsmanship. You might find the “The History of the Singer Featherweight: A Collector's Guide” incredibly insightful.
Understanding the nuances of a particular machine is key; for example, if you own a Singer 66, a thorough understanding of its stitch is essential for optimal operation. A deeper dive into “Understanding the Singer 66 Stitch: A Comprehensive Guide” could be beneficial.
Important: When sourcing a replacement, ensure it's compatible with your specific sewing machine model. Handwheel diameters and thread sizes can vary significantly.
The hunt for replacement parts can be a challenging but rewarding experience, often requiring persistence and a bit of luck. It's also crucial to understand the potential pitfalls of buying used parts, ensuring their compatibility and condition before committing to a purchase.
Preventative Measures to Extend Handwheel Lifespan
Taking proactive steps can help prevent future handwheel damage:
Extending the lifespan of your vintage sewing machine isn't just about repairing broken parts; it’s about implementing a comprehensive maintenance routine. This includes regular cleaning, lubrication, and proper storage, as well as addressing minor issues before they escalate into major problems. Understanding the machine’s mechanics is key to predicting potential issues and implementing preventative measures.
Many vintage sewing machine enthusiasts find that the process of restoring and maintaining these machines is a deeply rewarding hobby. The challenge of bringing a piece of history back to life, coupled with the satisfaction of creating something beautiful, makes the effort worthwhile. Sharing knowledge and experience within the vintage sewing machine community is also a great way to learn and connect with like-minded individuals.
Beyond the practical aspects of repair and maintenance, there's a certain romance associated with vintage sewing machines. They represent a bygone era of craftsmanship and attention to detail, and owning and preserving one is a way to connect with that legacy. Each machine has a story to tell, and it's up to us to keep those stories alive for generations to come. The effort involved in keeping them running isn’t always easy; it can require significant time and even specialized tools.
Remember that consistent care and a proactive approach are essential for extending the life of your treasured vintage sewing machine. By following the tips outlined in this article and seeking out additional resources when needed, you can keep your machine running smoothly for years to come. And if you're dedicated to preserving these classics, consider the long-term value of understanding the nuances of their internal workings - a far cry from disposable modern alternatives.